Overview
ViewMaster integrates directly with RouteMaster VR and RouteMaster VR Lite, allowing the sources and destinations configured in the router to be directly viewed. The “Switch” mode allows the ViewMaster operator to control RouteMaster outputs by clicking on the a video window.
Version 1.3.0 and earlier have limited functionality for RouteMaster integration.
Configuration
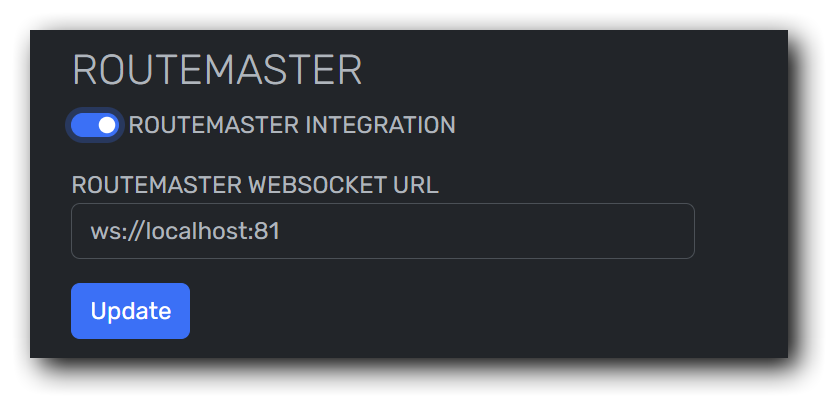
RouteMaster integration can only be enabled via the web UI.
First, enable the integration and enter the WebSocket URL of the RouteMaster system. This should be in the format ws://<ip_address>:<portnumber>. For example, if using RouteMaster on the same PC as ViewMaster, with RouteMaster’s default port, you would use ws://127.0.0.1:81 or ws://localhost:81
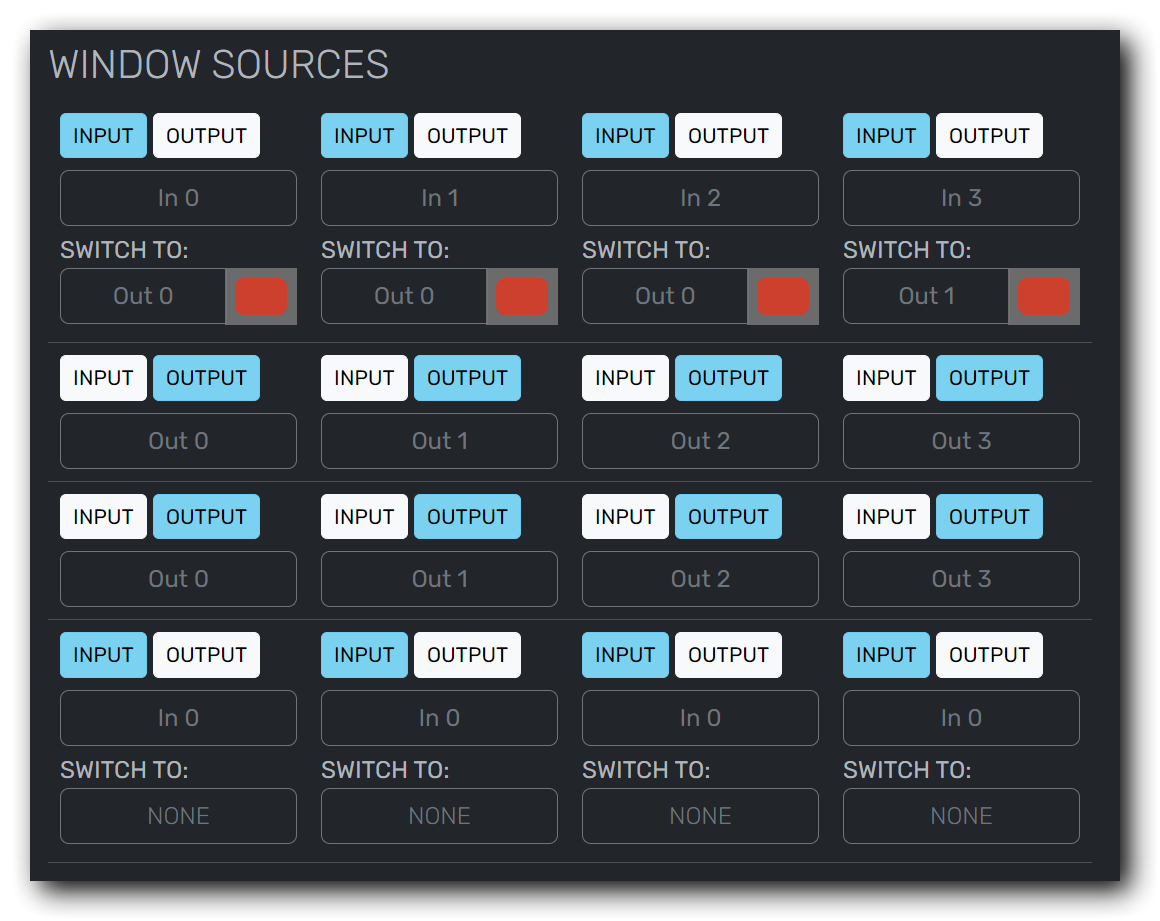
Then, switch to the Sources tab and select what each ViewMaster window should display.
Window Setup
Switching back to the Sources tab, each window can be independently configured to display either a RouteMaster input or an output. The signal to display can be chosen from the dropdowns, which will show the names configured by RouteMaster.
“Switch” operation
Each Input window can be configured to perform a router switch. Choose the output to switch, or NONE to disable this.
Now, when ViewMaster is running, clicking directly on the Video window will switch the router output to that source. This allows ViewMaster to act as a simple router control panel with live previews. The currently routed video input is shown with a coloured border. If an external system changes the routing this is directly reflected in ViewMaster. The colour selectors in the Web UI allow the border colour for a “switched” window to be independently configured.